Sunday, September 25, 2011

Papertrey September Blog Hop

This month's Papertrey blog hop challenge is to create a project inspired by the above photo.  I chose to take inspiration from both the colors and the stripes.  Here's my take on the challenge:
I created my "stripe" border using the pencil image from Happy Trails stamped in the colors (as I interpreted them) from the photo.   I've got to say that I really love the Happy Trails stamp set.  It is so much fun to use!

Supplies (all PTI unless noted otherwise):
Paper:   Stamper's Select White, Pure Poppy
Ink:  Enchanted Evening, Summer Sunrise, Hawaiian Shores, Pure Poppy, Basic Gray (SU)
Stamps:  Happy Trails, Mini Scrapbook Series:  Library Ledger
Other:  Beautiful Blooms II #3 die, Gem sticker (Stampendous)

Thanks for looking!

Monday, July 25, 2011

July Blog Hop

Oh my goodness!  I am still recovering from my wonderful weekend with all the Papertrey Ink celebrities and fans, so I almost forgot that it was Blog Hop day!  Okay, I DID forget that it was Blog Hop day, but, thankfully, Nicole's blog reminded me.  So I had to squeeze in a little crafty time today.  Not a bad thing. 

If you don't know about the blog hop, you can learn about it on Nicole Heady's blog.   There, you can see the beautiful inspiration picture.  I'm afraid to post that picture here because I'm afraid someone will think that it's a picture of my house.  I assure you that my house looks NOTHING like that.  I wish it did, but it just doesn't.

So on to my card...
It was fun to pull out my new Gracious Vases set as well as the Half & Half set.  I used papers I have printed from Dawn's Color Couture downloads (these are volumes 7, 8, and 9).   A little thing I tried that I thought was brilliant -- I have not {yet} invested in the Half & Half dies that go with the stamp set, so I used one of the stamps and stamped it on the back of my paper.  I then used my scissors (remember those??  Those little sharp things we can hold in our hands to cut with?) to cut out the shape.  It was pretty easy to cut, and you can't see my lines because they're on the back of the patterned paper.  Okay, "brilliant" may not be the right word, but it worked and I haven't spent the money on those dies {yet}.

Here's what I used (all PTI unless otherwise indicated):
Paper:  Stamper's Select White, Ocean Tides, Patterned Papers (Color Couture downloads) Vol. 7 Starbursts, Vol. 8 Lines, Vol. 9 Scrollwork) printed on Whisper White (SU)
Ink:  Onyx Black (Versafine), Summer Sunrise, Orange Zest, Dark Chocolate, Ocean Tides, Enchanted Evening, Lucky Limeade (SU)
Stamps:  Gracious Vases, Half & Half
Other:  Butterfly punch (Martha Stewart), Linen and Canvas impression plate, rhinestones, chalk (SU)

Thanks so much for looking!

Thursday, July 21, 2011

Digi images and bits and pieces

 I read enough blogs to know that I'm not the only one with leftover bits and pieces on my desk.  I just imagine that my piles are bigger than everyone else's because I'm so good at clutter!  I had a little fun yesterday playing with some of those leftover bits and am quite pleased at the results.  This first card started with the leftover strip of paper I had printed from Dawn McVey's Color Couture download (Vol. 5 Dots).  Really, how could I throw away a piece of paper so cute?!  I added a strip from a used piece of Raspberry Fizz Bitty Dots paper and a strip of my new decorative tape -- you know, the stuff they sell to go with the Smash books that are all the rage.  (No, I don't have a Smash book YET, but I certainly did buy that tape!)  I used a Mat Stack #4 die cut that I had cut from some scrap paper another day and the Happy Birthday stamp that I had printed a bunch of from My Digital Studio a while ago when trying to get the punch size right. (I've since figured it out, but now I have lots of little pre-printed happy birthday stamps from my mistakes!)  The flourish and the felt flower were freshly cut for this card, but they were so worth it!  I really love the way this one turned out -- so happy!
 This one (and the one below) started with the label left over from a 2nd or 3rd printing of the wonderful (free!) tag download from Papertrey's anniversary celebration this year.  I do think these are darling, but every time I want one, I have to print the whole sheet, so I have quite a few leftover bits on my desk just begging for their chance to shine.  This one is the one Nicole Heady, herself, designed.  I just mounted it on a Limitless Layers die cut, added some coordinating paper, and added a little flourish.  So easy, and, I think, very cute!
The tag on this one was designed by Maile Belles.  Like the other tag, it fit very nicely onto the Limitless Layers die.  I added some paper from my Thrift Shop pack, and had a pretty cute card!

Supplies for HB card:
Paper: Kraft (PTI), Stamper's Select White (PTI), black from my stash, Raspberry Fizz from Bitty Dots (PTI), Digi printed from Color Couture download Vol. 5 Dots (PTI)
Ink: (digi stamp!)
Stamps: Digi from Punch Bunch in My Digital Studio (SU)
Other:  Mat Stack #4 die (PTI), Scallop square punch (SU), Scribbles Swirls sizzlet die (Sizzix), Beautiful Blooms II #3 medium die, white/cream button (PTI), Black Dots Smash Tape

Supplies for Happy Birthday card:
Paper:  Kraft (PTI), Spring Rain from Bitty Box Basics (PTI), Green Boutique (PTI), Hawaiian Shores (PTI)
Ink:  (another digi! -- no ink on the fingers)
Stamps:  Digi image from PTI's anniversay celebration (by Nicole Heady)
Other:  Limitless Layers die (PTI), Scribbles Swirls sizzlet die (Sizzix)

Supplies for Celebrate You card:
Paper:  Rustic Cream (PTI), scrap piece of red from my scrap pile, Thrift Shop (October Afternoon)
Ink:  STILL no ink on my fingers
Stamps:  another fabulous digi image from PTI's anniversary celebration, this one from Maile Belles
Other:  sticker "gems" in center of pinwheels

Wednesday, July 20, 2011

More Fruit Fusion

I really love these little Fruit Fusion sets.  I didn't buy all of them, but I'm having fun with the ones I have.  Here is a card I made with Fruit Fusion:  Pear. 

And here's one using Fruit Fusion:  Apple.  Yes, I know, it's supposed to be an apple, not a peach, but I just had to try it.  :)   Not too bad, I hope.   I think that when I try it again (and I WILL try it again), I'll try using the stem from the pear to see if it will look less like an apple that way!   I must say that the inspiration for this card came from a card by Lesley Langdon that was on page 133 of Stamp It! Cards.   I'm getting lots of inspiration from that magazine right now!

Supplies for "You Make Me Smile" card:
Paper:  Kraft (PTI), Thrift Shop (October Afternoon), white cardstock (Georgia Pacific),
Ink:  Versafine Onyx Black, Ripe Avocado (PTI), Yellow Ochre (Colorbox) -- this one's drying up, so I ended up with kind of a rustic look, Tea Dye Duo (PTI)
Stamps:  Fruit Fusion:  Pear (PTI), Signature Greetings (PTI)
Other:  Top Note die (SU), Harvest Gold ribbon (PTI), Harvest Gold (I think!) button (PTI), embroidery floss

Supplies for "You are a Peach"
Paper:  Kraft (PTI), Library Ledger (PTI)
Ink:  Peach Parfait (SU), Ripe Avocado (PTI), Versafine Onyx Black
Stamps:  Signature Greetings (PTI), Fruit Fusion:  Apple
Other:  Certainly Celery ribbon (SU), pinking shears

Tuesday, July 19, 2011

A little Fruit Fusion

I must confess:  I'm absolutely smitten with this watermelon slice.  The stamps, the patterns, the die -- I just love it!  Here is my favorite (so far) attempt with this little set.  I just think it is perfect when stamped with Poppy Parade and Pear Pizazz ink (SU).  No special techniques to trip me up on this card.  It's just plain and simple.

Supplies:
Paper:  Thrift Shop (October Afternoon), Kraft (PTI), Library Ledger (PTI), Stamper's Select White (PTI)
Ink:  Poppy Parade (SU), Pear Pizazz (SU), Versafine Onyx Black, Tea Dye Duo -- Chai (PTI)
Stamps:  Fruit Fusion: Melon (PTI)
Other:  Certainly Celery ribbon (SU), Fruit Fusion: Melon die (PTI), pinking shears

While I was playing with Botanical Silhouettes...

I was playing with my new Botanical Silhouettes set (oh, I just love that font combination, don't you?), I decided I really wanted to try a little emboss resist -- a technique that NEVER works for me the way I envision that it should.   This is the best I've done yet.  I didn't have any paint brushes (then -- you can bet that I do now!) and had to use Q-tips for my painting, but I think it came out okay.  Way different than most cards that I do.  Because my photography is so bad, I took a closer picture so you can see the embossed image a little better.


Supplies
Paper:  Rustic Cream (PTI), Concord Crush (SU)
Ink:  Versafine Onyx Black, Versamark, Concord Crush (SU), Pear Pizazz (SU), Summer Sunrise (PTI), Berry Sorbet (PTI)
Stamps:  Botanical Silhouettes (PTI anniversary set)
Other:  clear embossing powder

Playing a little catch-up

It's been forever-and-a-day since I've added anything to my blog.  I think it's feeling neglected.  My craft desk, however, has actually been feeling less neglected (but very messy) the last few days, so I think I should start sharing some of my fun! 
I've managed to miss posting for quite a few of Papertrey's Make it Monday challenges, but I really liked several of them and am playing a little catch-up on trying out the techniques.  The challenge a couple weeks ago was "multi-color stamping with ink refills."   The way-too-talented Betsy Veldman demonstrated how to use fun foam and re-inkers to create a custom multi-colored stamp pad. (You can see that here.)  That was great, except I don't have many re-inkers.  I looked around for a way that I could do this with my supplies and found that I could use my Stampin' Up markers for the same effect.   First, I stamped the image (from my new Botanical Silhouettes anniversary set -- so pretty!) onto the fun foam.  Then, I used the markers to color the flowers on the foam.  Finally, I used the foam as my ink pad to produce multi-colored flowers in one stamp.  I like the way these came out and am eager to try again with other stamps!  
Supplies:
Paper:  Fine Linen, Hawaiian Shores, Rustic Cream (PTI)
Ink:  Versafine Onyx Black, Melon Mambo (SU), Bermuda Bay (SU), Dusty Durango (SU), Ripe Avocado (PTI)
Stamps:  Botanical Silhouettes (PTI anniversary set)
Other:  Mat Stack #4 die (PTI), Linen and Canvas impression plate (PTI)

Friday, March 25, 2011

Papertrey March Blog Hop


This month's Blog Hop challenge is to use embroidery floss in a "fun and inventive way." Lucky for me, Papertrey defined "fun and inventive" for us: "This could include stitching, wrapping it around and tying it like ribbon, braiding, accenting tags, embroidered patterns or anything else you can dream up! " Whew! I didn't have to think too far outside the box with those instructions. :)

My first thought was to use something that I used on some of my Christmas cards -- I used the same knot that I used waaaaaayyy back when I did candlewicking with my grandma. I think the candlewicking knot is similar to a French knot, but I don't really know enough about either to elaborate. I just know that I have this knot technique in my hands' muscle memory from my childhood. I can do it automatically, but I can't do it if I try to think about it too much. Anyway, I put a knot in each of the "flower" button holes. I also decided to use the same floss to stitch a line leading to the sentiment.

What you can't really see in the picture -- well, the knots, for one. They're there in the button holes, I promise. They're just hard to notice in my picture. Also, the raised white layer of the card is embossed with a dot pattern. It looks good in real life, but my really affordable photographer just can't get it to show in the picture. You also can't see how many of these great little buttons I've accumulated since I received my new button dies. I've had fun rolling out the little buttons! That's why I had to use my Everyday Button Bits set for this card -- I had to justify die cutting all of these buttons! I think I may have to make a lot of button bits cards.

Thanks for looking!

Supplies (all PTI unless noted otherwise):
Stamps: Everyday Button Bits
Ink: Versafine Onyx, Pear Pizzazz (SU)
Paper: Stamper's Select White, Simply Chartreuse, 2009 Bitty Dots Basics
Other: Nestabilities Labels 2 dies, Buttoned Up #2 die, Backgrounds 1 Stampin' Up Texturz plate, embroidery floss from my stash
Posted by Picasa

Saturday, March 5, 2011

Make It Monday: Fun Foam!


Yes, I'll admit it. I'm one of the thousands of crafters who suddenly had to run to Michael's this week to buy fun foam. It's not our fault, though. We had to. You see, there was this video. There was a challenge. It looked like fun. .... and, let me tell you, it was fun! The challenge was to use fun foam in our projects this week. (And, as always, to use at least 1 Papertrey product.)

I won't admit in writing just how many cupcake variations I have now cut out of fun foam. This is the only one I'll show right now, but don't be surprised if little fun foam cupcakes show up again in the future. I've got a good supply. I'm also very busy imagining all of the other fun shapes I can cut this stuff into ... butterflies, polka dots, flowers, frames, bookmarks. Good thing this stuff came in a pretty thick little stack.

Supplies:
Paper: Kraft cardstock (PTI), Color Couture Vol. 5 (PTI) patterned papers printed on Georgia Pacific card stock, Raspberry Fizz (PTI), Stamper's Select white (PTI)
Ink: Versafine Onyx black, Orange Zest (PTI) -- even though you can't see it because it mostly faded into the fun foam {lesson learned}
Stamps: Cupcake Collection
Dies/ Punches: Cupcake collection, Sizzlet flourish, Mat Stack 4 (PTI), Scallop border punch (SU)
Other: Raspberry Fizz ribbon, Scor Tape (and a pink-tinted glitter), PTI rhinestone, and FUN FOAM!

Thanks so much for looking!
Posted by Picasa

Sunday, February 27, 2011

Papertrey Pages Challenge -- finally!


After months of good intentions that went nowhere, I am finally participating in the Papertrey Pages challenge this month. Woo Hoo! When I saw this month's challenge to do a layout for a birthday or anniversary, I was sure that I'd have to wait until next month to participate, since I mostly scrapbook my little guy, and his birthday is next weekend. But I looked through my waiting-to-scrap pictures, and saw that I had pictures from my nephew's birthday just sitting there waiting for me. :) I already knew which stamps I would use -- I just bought the Banner Builder set last month and haven't had a chance to use it yet, so I pulled it out. So much fun to use and to cut out (I decided to show restraint and NOT buy the matching dies. So far, so good without the dies.) It always feels good to create a scrapbook page.

Supplies used:
Paper: SU Kraft, October Afternoon Thrift Shop
Stamps: Banner Builder, Fillable Frames #6, Communique Curves Sentiments, Cupcake Collection
Ink: Versafine Onyx Black, SU Poppy Parade
Other: PTI Fillable Frames #6 die, SU Scallop Trim Border and Corner punches

Thanks so much for looking!
Posted by Picasa

Monday, February 14, 2011

Make-it Monday #2


Today's video tutorial and challenge over at Papertrey Ink is to use a vellum strip on a project. Since I just got in a really big (for me, anyway) box from Papertrey last week, I have a lot of goodies that I haven't played with yet. This challenge was begging me to try out Lisa Johnson's Flutterby Friend set that I finally purchased. Oh, I'm so glad I did. What a gorgeous set! I also needed to ink up another set that was in my new box -- Background Basics: Sheet Music. Oh, Dawn, thank you so much for giving us the set that so many of us were dreaming of. It's a beautiful background. For my card color, I chose the color that I really hope is close to the new Royal Velvet. This one is Stampin' Up's In-color Concord Crush. I am in love with this color, and I really don't even like purple as a general rule. I'd rather order my paper from PTI, though, so I'm hoping that I will be equally in love with Royal Velvet. Since I already had horizontal lines running across the paper with the Sheet Music background, I thought that the additional lines from a vellum strip would be too much, so I decided to run the vellum through with that well-used Fillable Frames #4 die. (I do own other Fillable Frames, I promise!) I love the way my embossed stems and even the background show through the vellum. By the way, since it's always an issue with Vellum, I should say that I attached the vellum tag with vellum tape. I think I bought it a Michaels ages and ages ago. I'm impressed that it doesn't show. I would have used my Xyron, though, if I had any adhesive in it.

I need to say a word about the embossing. I think that word is "ACK!" Seriously, Nicole makes it look so very easy. I used the same embossing powder she did. I used the embossing buddy just like she did. Evidently, I'm just stickier than she is. This is actually the 2nd card like this that I made. The first attempt had even more stray white specks than this one. I think I really need to just limit myself to clear embossing powder and leave the pretty white (or black or silver or gold...) stuff to the embossing pros.

Supplies:

Paper: Concord Crush (SU)
Ink: Versamark, Fresh Snow (PTI), Concord Crush (SU)
Stamps: Background Basics: Sheet Music (PTI), Flutterby Friend (PTI)
Other: Filigree White embossing powder, Fillable Frames #4 die (PTI), Scor-pal
Posted by Picasa

Saturday, February 12, 2011

"Big" challenge


In honor of the new series of super-sized sentiments that will be released this year at Papertrey, today's challenge is to include a "big" element on a project. Since "big" is a relative term, I decided that my element would look bigger on a smaller card. I used half of an Archiver's pre-cut gate fold card to make a card that measures 5 inches by 3 1/2 inches. I cut a strip of October Afternoon Thrift Shop patterned paper to line the bottom of the inside of the card (the part that shows on the outside. Then I cut a circle to line the front of the card from another coordinating paper in that same pack. My sentiment is stamped in Dark Chocolate on a tag cut with the Fillable Frames #4 die. My "big" element is my flower. It is two layers of felt cut with a Beautiful Blooms II die. The button is one of the largest one from my white/cream mix of PTI buttons.

Supplies:

Stamps: Well Scripted (SU)
Paper: Archivers, October Afternoon Thrift Shop, Rustic White (PTI)
Ink: Dark Chocolate (PTI), Tea Dye duo: Chamomile (PTI)
Dies: Beautiful Blooms II, Fillalbe Frames #4
Other: PTI felt, PTI Button, PTI Rustic Jute Button Twine

Thanks for looking!
Posted by Picasa

Friday, February 11, 2011

Tag Challenge


Another February day = another Papertrey Challenge. Today's challenge is to create a tag that incorporates a frame. For my tag, I cut Kraft cardstock with the Library Card Tag. I stamped the tag's background with the Library Ledger set in Versamark ink. I added a strip of Library Ledger paper that I had in my scraps. I also used (cheap) red paper from my scraps to punch the butterfly and to die cut the circle scallop that is folded over the top. My frame is die cut with the Fillable Frames #4 and stamped with the matching stamp frame. A printed "sentiment," die cut felt flower and punched butterfly finished off the card.

Supplies:
Paper: Rustic cream (PTI), Kraft (PTI), Library Ledger patterened paper (PTI), red (from my stash)
Ink: Hawaiian shores (PTI), Smoky Shadow (PTI), Versamark
Stamps: Fillable Frames #4, Vintage Labels (SU), Define Your Life (SU Digital -- resized and printed from My Digital Studio)
Other: PTI Hawaiian Shores felt and button, PTI Beautiful Blooms II #3 die, PTI Fillable Frames #4 die, Martha Stuart butterfly punch, circle scallop nestability die, PTI Button Twine

Thanks so much for looking!
Posted by Picasa

Wednesday, February 9, 2011

Make it Monday


Yes, I know it's not Monday. Thank Heavens! But over at Papertrey, they've started a new Make it Monday series of videos. There will be a inspirational/ informational video every Monday. That video will also come with a challenge. In the first video, Erin demonstrated the Go-to Sentiment card. She taught us how to use multiple sentiments to create a pretty nifty focal point for a card.

Before I started this process, I really had no idea how many bazillion versions of "Thank you" I have in my stamp collection! I carefully chose a few of them to use on my card. I like this idea, and definitely think I'll make more of these. I also think this would be a really cool idea to incorporate into my scrapbook.

Supplies:
Paper: Smokey Shadow, Teracotta Tile, Stamper's Select White
Ink: Basic Gray (SU), Versafine Onyx, Teracotta Tile
Stamps: Okay, this is really too many to list -- most are PTI, including Giga Guide Lines, Star Prints, Butterfly Dreams, Signature Greetings, Mixed Messages and Mega Mixed Messages. Some are SU
Other: Harvest Gold felt, Harvest Gold button, Ribbon (Basic Grey, I think??), Rhinestones (PTI), Beautiful Blooms Dies.

Thanks for visiting my blog!
Posted by Picasa

Papertrey Color Swatch Challenge


The challenge over at Papertrey for Day 5 of the anniversary challenge is to use one of the color combinations included in the free color swatch download on Nicoles blog. I chose to use the same colors that Lisa Johnson used -- Pure Poppy, Spring Rain, Kraft and Vintage Cream. (Okay, I'll admit -- I switched it up to Rustic Cream because I love that stuff!)

I'm going to let my little guy send this little card to his Grammy and Papa for Valentine's day. Now that I'm looking at the enlarged photo, I think I need to clean some extra glitter off first!

Supplies:
Paper: (all Papertrey) Kraft, Rustic Cream, Spring Rain
Ink: Pure Poppy, Spring Rain, Versafine Onyx
Stamps: Tiny Treats: Valentine
Other: Rik Rak die, Mat Stack 4 die, Nestability scallop circle die, Skor tape, glitter

Thanks for looking!
Posted by Picasa

Sunday, February 6, 2011

Papertrey Designer Challenge

I'm back again tonight with some challenge entries.  Today PTI gave its customers a free gift -- a beautiful set of tag stamps in digital format to print out and enjoy some instant gratification.  This set of tags is just wonderful!   I'm printing a lot of these, because I can see myself using them often.  For tonight, I managed to make some small projects -- a few little 3" x 3" enclosure cards.  I think they turned out so great.  I can't wait to find someone to give them to!  (I should go ahead a apologize for the crummy pictures.  It's late.  And I'm not a great photographer, anyway.)


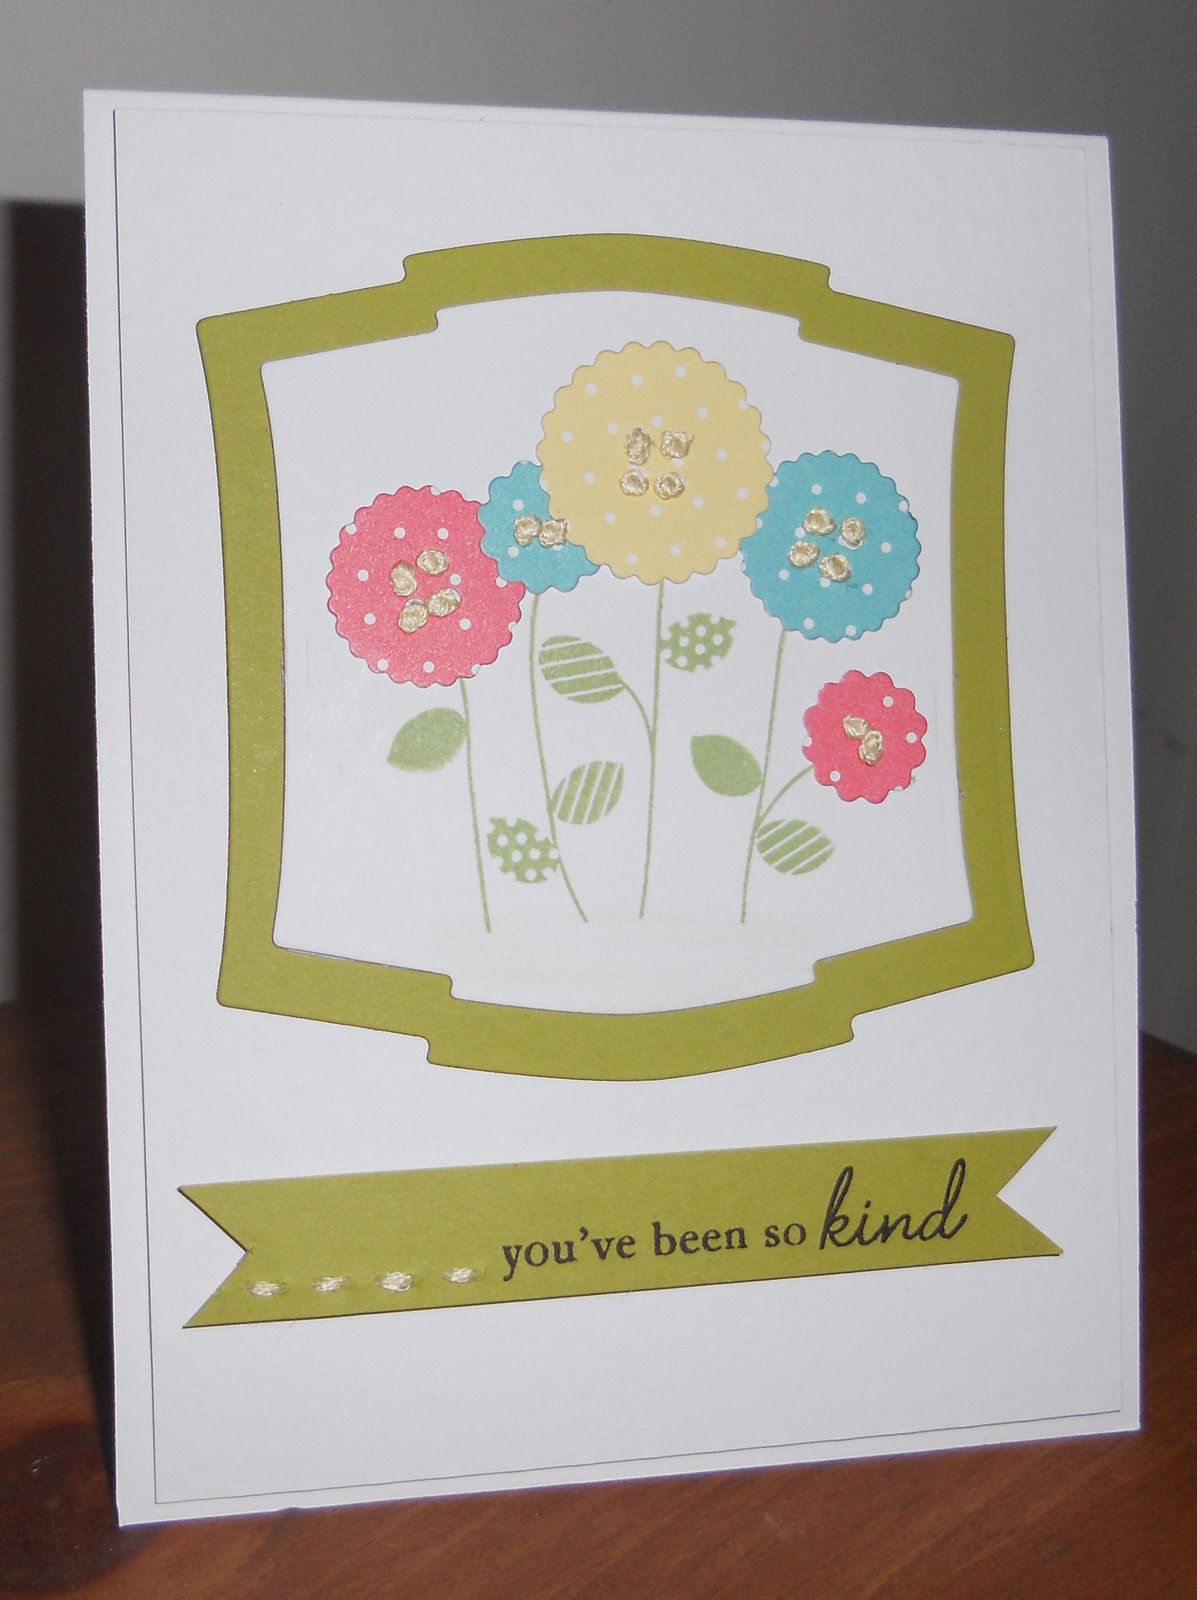
First, my favorite.  The tag on this card is the one designed by my hero Dawn McVey.  I immediately noticed that it coordinated with a digital download she had designed for her Color Couture series.    I noticed because it's one that I actually own!  I was excited to print it out and use it to make a sweet little card.


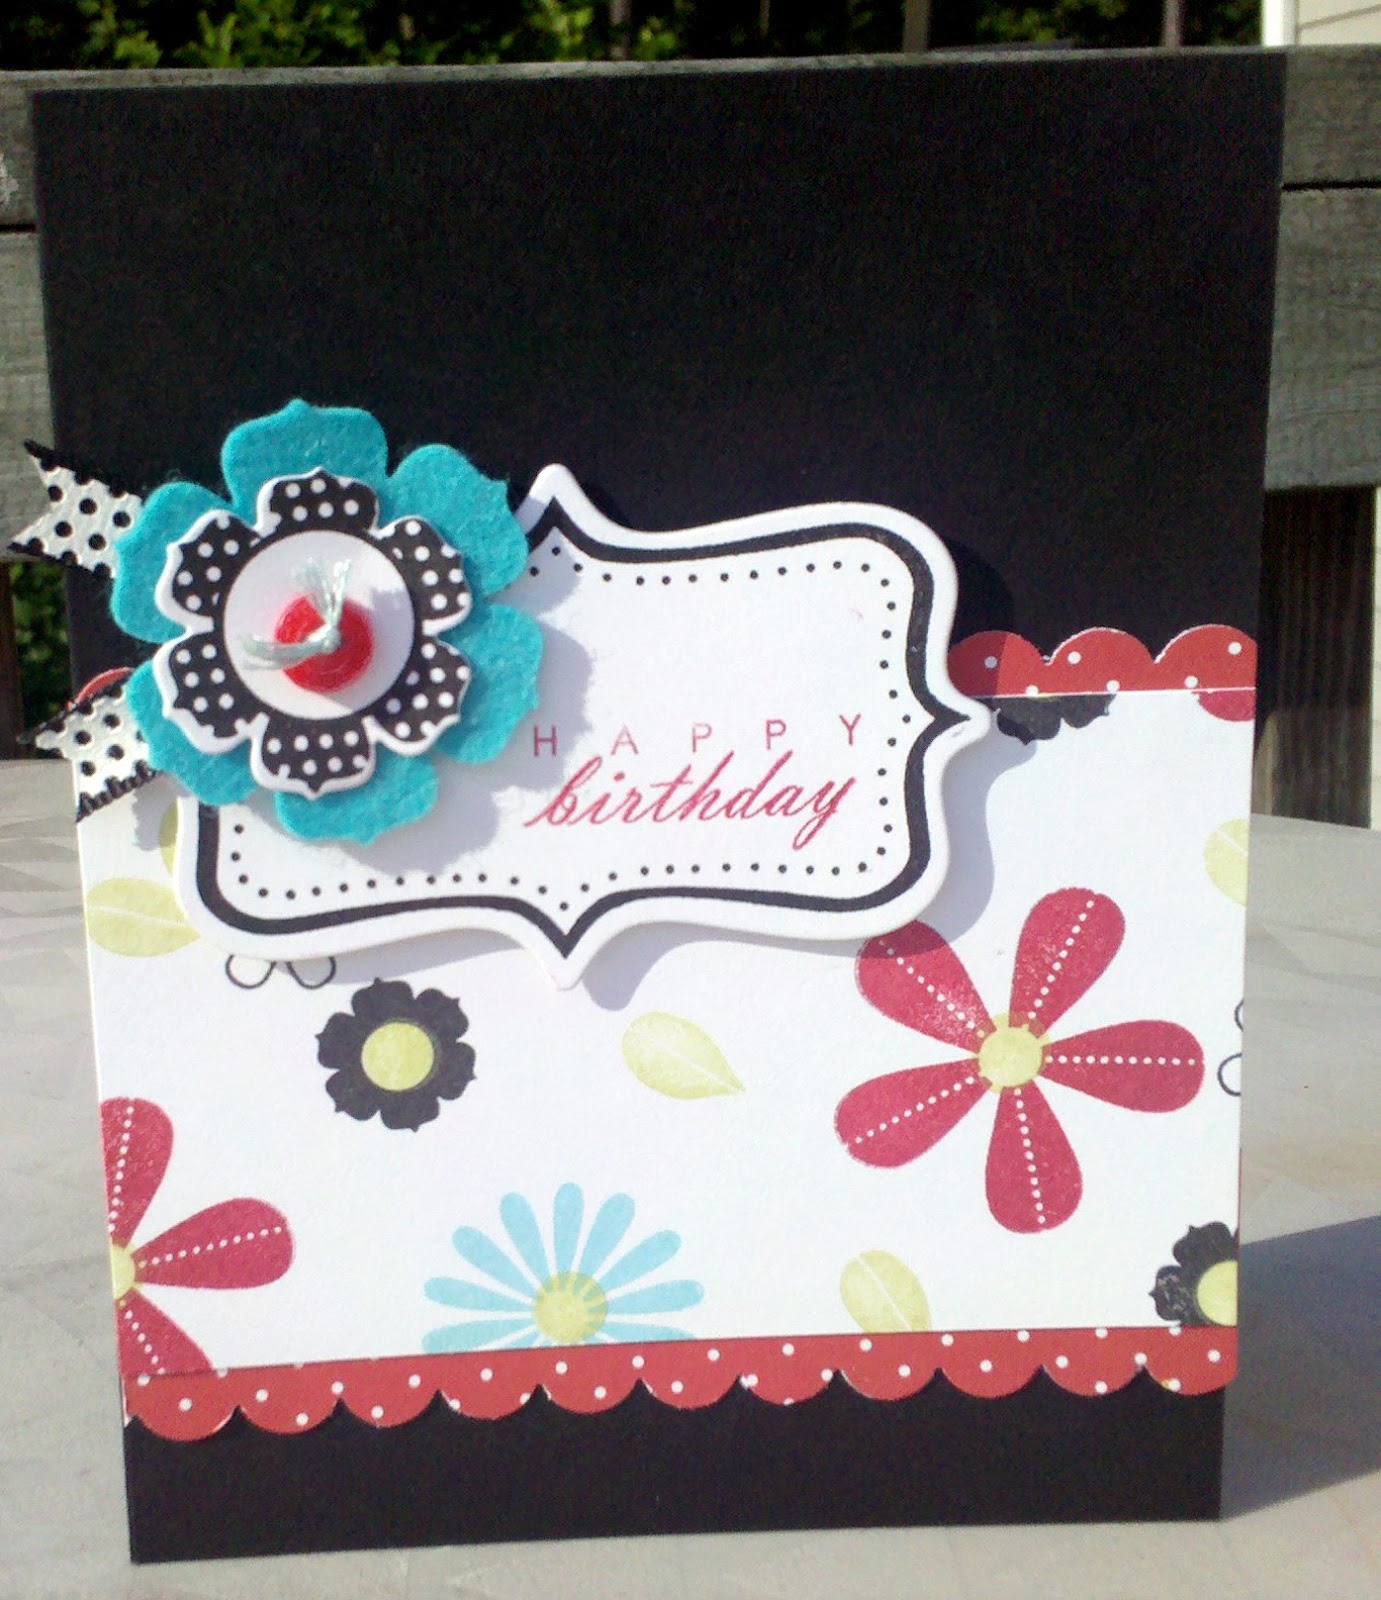
My second favorite was made with the tag created by Nicole Heady herself.  It's a great tag that I can get a lot of use out of.  It was really hard to get a good picture of this one.  I wanted to show the background I stamped with A Little Argyle.  Yesterday as I was looking through everyone's amazing cards entered in the big contest (No, I didn't win that, but I'm very happy that another "Amy" did!)  I told myself that I do not use that Argyle set enough.  It's really a great set -- it just scares me a little.  (Don't ask.  I really don't know why.)  So I used it on two of my little cards tonight.  :)  Yay me!  I'll work my way up to using it on bigger cards and then (dare I?) scrapbook pages.


Finally, my last card of the night.  I love this little image by Lisa Johnson.   Okay, I love ALL images by Lisa Johnson.  The colors certainly didn't come out great in this picture.   For this one, I printed the "stamp" tag and colored it with Stampin Up markers and a blender pen.  I like how the hearts turned out, but I'd really like a do-over on the ground.  I do think it's better in real life than it looks in the photo, though.  (I really need to hire a new photographer.)  After coloring, I spritzed the whole tag with Glimmer Mist.  Sparkle makes everything better, right?  The Pink Pirouette background is stamped with A Little Argyle in Fresh Snow, but you'd never know that from my picture. 

I can't wait to have some time to create more of these with the other tags.  Honestly, I decide that each one I pick up is my favorite.  I think I have 9 favorites!   Is that possible?  Thanks, PTI and stamp designers, for such a wonderful gift! 

Thanks for visiting!

Supplies:
"Smile"
Paper:  Aqua Mist (PTI), June Color Couture download (PTI), Kraft (PTI)
Ink:  Versafine Onyx
Stamps:  PTI anniversary download, Mega Mixed Messages (PTI)
Other:  Scor Tape, glitter, PTI Harvest Gold button, PTI rhinestones, Hawaiian Shores felt (PTI), Fiskars punch

"Happy Birthday"
Paper:  Kraft (PTI), Aqua Mist (PTI), Hawaiian Shores (PTI), Georgia Pacific White
Ink:  Fresh Snow (PTI)
Stamps:  PTI anniversary download,  A Little Argyle (PTI)
Other:  Hawaiian Shores ribbon, Diamond stickles, PTI Beautiful Blooms II #1 die

"Love"
Paper:  Melon Mambo (SU), Pink Pirouette (SU), Kraft (PTI)
Ink:  Fresh Snow (PTI), Melon Mambo marker (SU), Soft Suede marker (SU)
Stamps:  PTI anniversary download, Mixed Messages (PTI), A Little Argyle
Other:  Scor Tape, glitter, flower rhinestone (probably from Archiver's Hot Spot), Beautiful Blooms II #1 die

Saturday, February 5, 2011

Papertrey Favorites

Today is the first contest of the 2011 Papertrey Anniversary festivities, and, boy, is it a big one!  The design team has featured their favorite projects of this past year, and one very, very, very lucky person will win the Ultimate Card Kit -- Everything needed to create all of those projects.  (Give me a moment to catch my breath.  It's really an unbelievable prize.)


One way to win is to post/ re-post my favorite project of the year.  Fortunately, I have a really small blog.  (Okay, a little shameful, really.)   But choosing my favorite was really easy.  This Beautiful Blooms II card is hands-down my favorite card of this year.  I love everything on this card -- the bold colors, the felt flower, the fillable frame, the polka-dotted black and white ribbon...  It just screams "happy" to me. 

Materials used:
Cardstock: Stamper's Select White, True black, (The scallop was punched from the cover of the Bitty Dots paper pack)
Ink: Hawaiian Shores, Pure Poppy, Spring Moss, Versafine Black
Felt: Hawaiian Shores
Stamps: Beautiful Blooms II, Fillable Frames 4
Dies: Those wonderful coordinating dies for the 2 stamp sets above!
Ribbon: Basic Grey (I think)
Button: PTI White/Cream (colored with a Sharpie -- must resist the Copics!)

Thanks so much for looking!

Amy

Tuesday, January 25, 2011

Papertrey January Blog Hop Challenge

It's time again for the Papertrey Blog Hop! This month's challenge was a good one for me:
"With the new year comes a clean slate along with many resolutions. This month's blog hop challenge involves you challenging yourself to use a Papertrey stamp set that has yet to see ink or even one that might be collecting a little dust! Go through your stash and see what little used treasure it might hold."
There are a few (really, truly -- only a very few!) PTI sets that I've "collected" and think are amazing but have had a hard time using on a real project. In addition to Nicole's stamp set challenge, I also challenged myself to use this beautiful October Afternoon paper that I've been hoarding and have barely used. (Honestly, I can't call all of the loving gazes I've spent on it as "using" it.)
So on to the card. I managed to use three under-loved sets on this card: Quilter's Sampler, Quilter's Sampler Additions and Boxes, Bags and Tags. I have to admit that I realized after several reject "quilts" and layout ideas exactly why I so rarely pull this set out. I really love the idea of making my own quilts, but I just don't seem to get it quite right. I was hoping that simplicity would be the answer, but I feel like my result was more "plain" than "simple." I do love the style of the sentiments in Quilter's Sampler and included one on the inside of my card. The other under-loved set, Boxes, Bags and Tags, was much easier to use. I should pull it out more often because it really does have some nice little images in it. I love its little flowers and flourishes.
Here are the products I used:

Stamps: Boxes, Bags and Tags (PTI), Quilter's Sampler (PTI), Quilter's Sampler Additions (PTI), Mixed Messages (PTI)

Paper: Kraft (PTI), Thrift Shop papers and embellishements (October Afternoon), Harvest Gold (PTI)

Ink: Aqua Mist (PTI), Versamark, Versafine Onyx Black, Colorbox Yellow Ochre

Other: Harvest Gold Button (PTI), Rustic Jute Button Twine (PTI)

Thanks so much for looking!